PixInsights Tips: Effective Noise Reduction (Part 3 of 3)

 Noise reduction is one of the most fundamental aspects of astrophotography processing. We work with images of minimal signal to noise ratio, a ratio that for best results must be increased, often by a significant amount, in order to produce a quality image. Ironically, given it’s importance, noise reduction is one of the most misunderstood, and possibly one of the least understood, aspects of image processing. PixInsight provides a wide range of powerful noise reduction tools that can assist us in the pursuit of lower noise and higher SNR. These tools are often so powerful, however, that the inevitable result, if you are not already familiar with them (and possibly even if you are) is artifact-ridden, plasticized images that have a very artificial look and feel.
Non-Linear phase
The final stage of processing is performed on non-linear data. In other words, on stretched data. For most astro photos to reveal anything other than stars, they must be stretched. Stretching will usually involve adjusting white and black points inward to increase contrast, and the midpoint towards the black point to expand fainter details while leaving brighter data (stars) alone. How well you can perform these adjustments may depend a lot on how much noise you have, the standard deviation of your signals, particularly beyond two or three sigmas.
There can be tens of thousands to even hundreds of thousands of pixels that stretch off your signal peak towards black. This blacks “tail” can limit your ability to bring the black point in to increased contrast without clipping information. Inter-stretch noise reduction can help reduce the length of that blacks tail on your histogram, and allow you to shift the black point up much closer to the signal and increase contrast more without clipping, or by clipping significantly less data. What is the blacks tail?
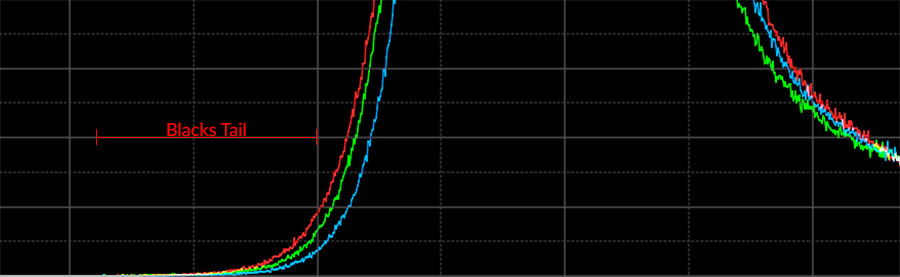
It is the back part of the histogram, off the primary peak, that trails off and eventually dissipates. This “tail” in the histogram represents the darkest pixels in the image. It can extend all the way from the histogram peak to the very left edge, in fact.
Depending on how clean your data is and how effective your inter-stretch noise reduction is, you may find that you still need a final pass of NR to give your image that final polish. For DSLR data, you may find the need for both luminance and chrominance NR after stretching. DSLRs have a tendency to spear information around due to the use of a low pass filter and the need to be demosaiced (interpolated). This can result in some blotchy color that can be difficult to remove while the data is linear, but easier to remove once it is non-linear. For monochrome data from a CCD or CMOS camera, you will usually find that the noise takes on a clean characteristic in luminance, and may only require chrominance NR.
Keep in mind that post stretch/late stage noise reduction, while it can definitely improve the chromatic characteristic of your noise, can also sap some amount of color from the data as well. You will want to be careful about how you apply NR to stretched data, and will want to avoid pushing any NR too far. You may also need to follow up chroma NR with some saturation enhancement to restore color richness.
Inter-stretch Noise Reduction
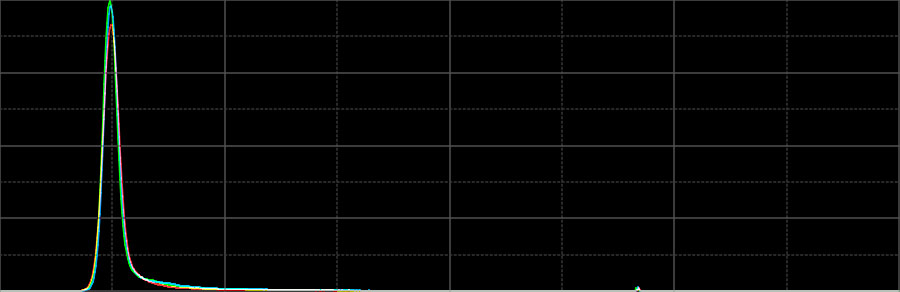
The first stage of non-linear noise reduction will often start right around the same time you start stretching. I find that an iterative approach to stretching if often most effective, allowing you to carefully control your signal. You may also find that using multiple stretching tools, such as masked stretch, histogram transformation and/or exponential transformation can each solve different problems involved in stretching. One of my first steps is to expand dynamic range using HT so that my star peaks are shifted towards the midpoint (this increases your headroom, and prevents clipping of stars while you stretch, without really affecting the nature of the bulk of the signal). I will then perform one pass with a basic midtone transfer to shift the histogram up to about the 1/4 point:
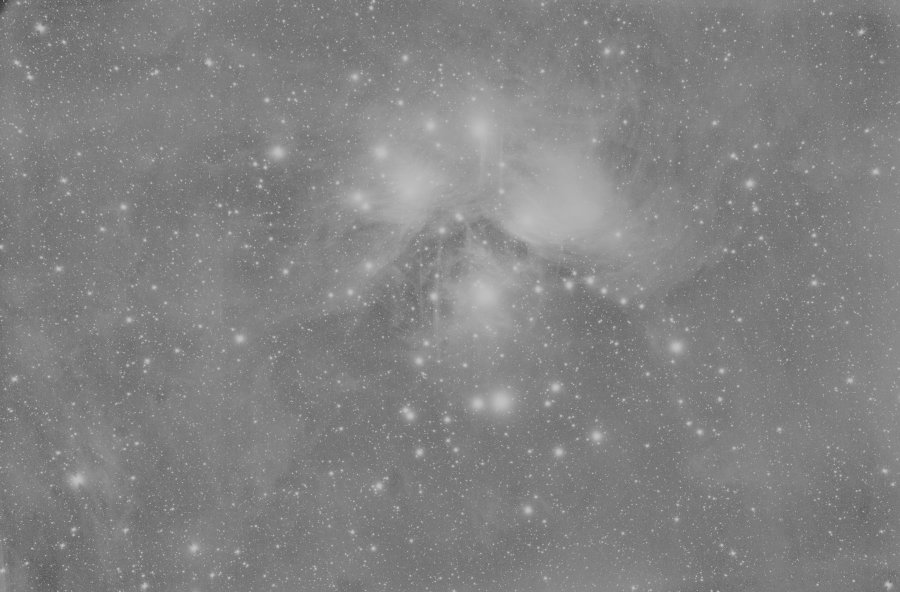
Normally, after this initial stretch, you would simply bring in the white and black points to produce a fully stretched image. However that can require clipping a good deal of information, and the final results may often be fairly noisy:

After that, I will perform a pass of noise reduction to bring in that blacks tail. Reducing the length of the tail gives you room to bring in the black point without clipping those pixels. This preserves the faintest details in the image, and allows you to improve the global contrast of the image by allowing you to move the black point closer to the histogram peak. To reduce this tail, I will usually use ACDNR. I start by extracting a luminance copy from the image being stretched, and applying an STF to it via HT. I will then use the dynamic range expansion feature of HT to bring in the black and white points to 0.5 and 1.5, and shift the midpoint of the histogram to 50%. The following HT curve:
Will usually give me this mask:
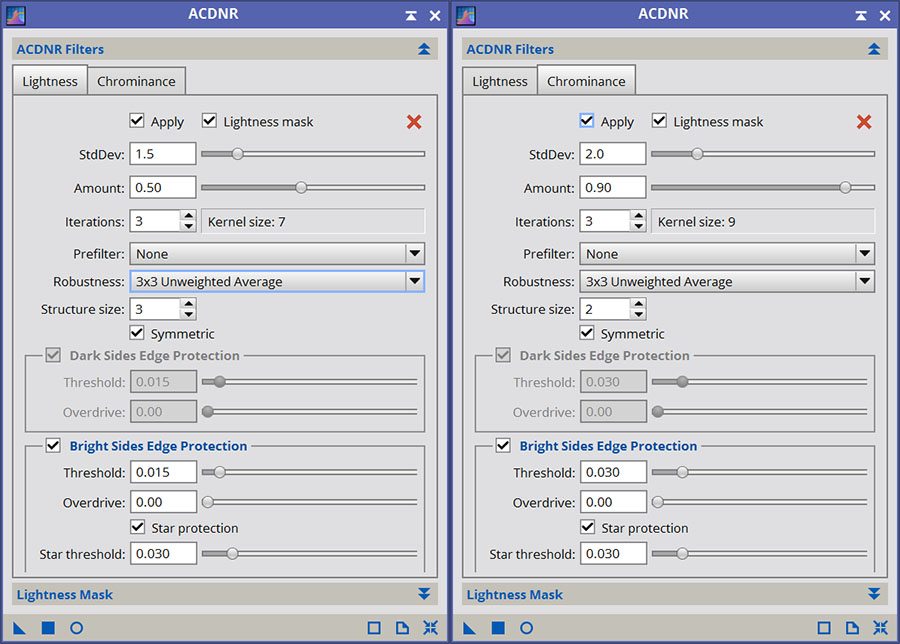
Applying this mask to the image and inverting will usually provide ample protection to the whole image, particularly the highlights. If you find that is not the case, you can then apply HT again, and simply shift the midpoint more to the right until the highlights are properly protected. If you find that highlights are affected too much, you can pull the white point in to increase protection of the highlights. With this mask applied to the partially stretched image, you will want to apply ACDNR with moderate settings. I will usually apply Luminance and if applicable Chrominance NR with settings something like the following:
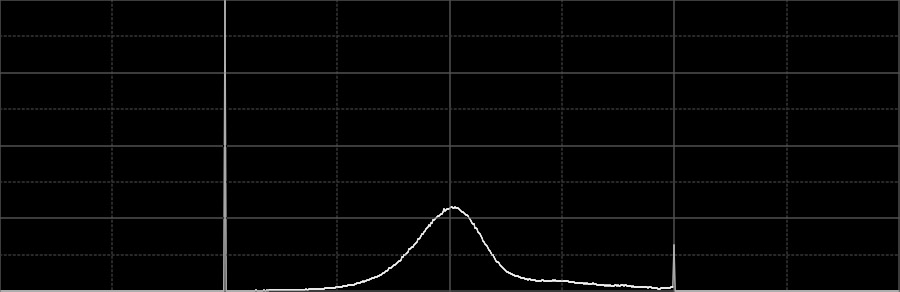
This will have the effect of shifting the blacks tail rightward, into the histogram peak. It will also flatten out the curve where the peak starts to taper out into the tail. This shifting and flattening of the curve makes it possible to bring the black point much closer to the histogram peak while clipping far fewer pixels, if you end up clipping any at all. You will also usually find that the three color channels align better, which can help you avoid chromatic issues when pulling in the black point. An example of the changes to the histogram:
Bringing in the white and black points after reducing noise avoids excessive clipping of background pixels, and presents a smoother, cleaner result. Colors are often better preserved in the background as well:
Post-stretch Noise Reduction
(Pending…)
High Chromatic Background Noise Reduction
(Pending…)
SERIES
- Part 1 – Overview, NR process introductions, preliminary steps
- Part 2 – Linear noise reduction
- Part 3 – Non-linear noise reduction
