


Ultra High Res Moon – Waning Gibbous
| 3 imagesA few days after the recent supermoon we just had, I decided to photograph my once favorite night sky companion again: the Moon. I’ve photographed the moon for years, with progressively better and better equipment. One of my earliest moon photos, Crescent Moonset, won me an award and publication in an online magazine many years ago (not sure if the publication is still around):

Crescent Moonset
This shot is one of my favorites, particularly because of the lucky catch of the treetops in the foreground as the moon set behind them, and the faint high clouds around it. Technically, it is not the greatest shot…a little bit of blown highlights, on the noisy side.
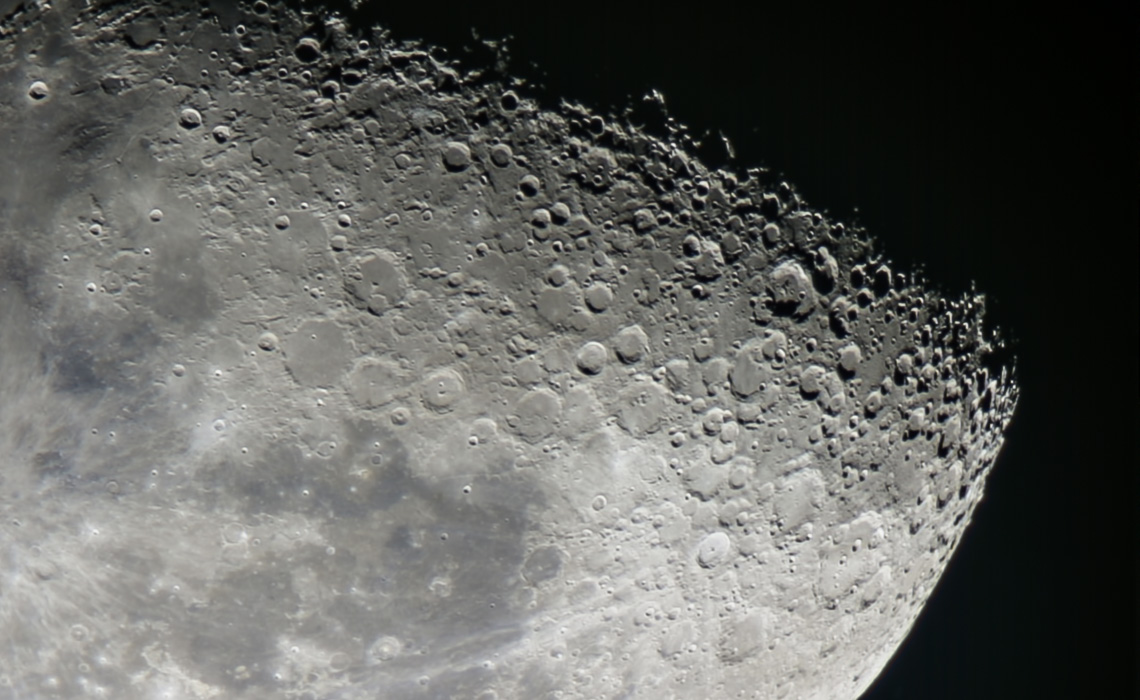
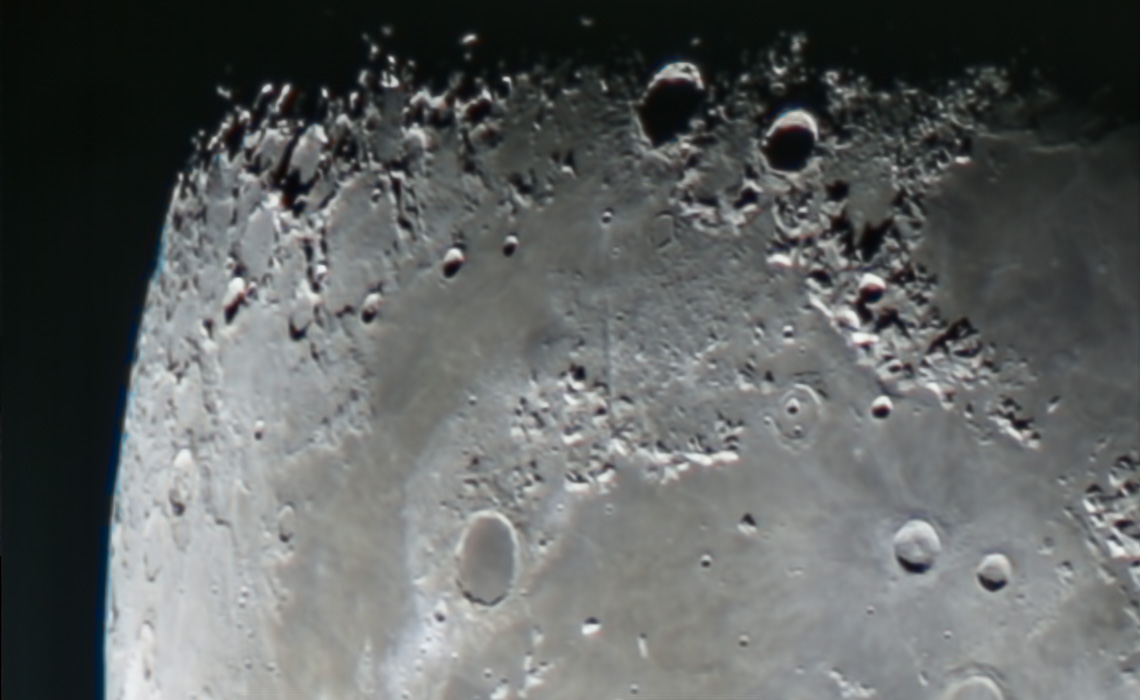
Since this very early moon photo, I’ve learned a lot, and now have some significantly more powerful equipment and software that give me the ability to take images like the three I’ve shared here today. Ultra high resolution, ultra low noise, and packed with surface detail. I’ve wanted to create images like this of the moon for a very long time, and I’m quite happy to finally have the capacity to do it.
It takes a little bit of work to do. Using a technique called “Lucky Imaging”, I use software called BackyardEOS to take high speed video of the moon while tracking it across the sky with an Orion Atlas equatorial mount, and EQMOD drivers, I gather a couple thousand frames. I then use software called AutoStakkert!2 to analyze the frames of the video sequences, pick out the 5-10% best of the best, and stack them like I stack my astrophotography.
It sounds complicated, but it is actually not really as difficult as it sounds…it is just a bit of work to gather the video sequences in the first place, and process them (even on my high powered computer, performing the analysis and integration processing can take a good five to ten minutes for each video sequence.) All this complexity is necessary, however, to get nice, crisp, detailed images because of atmospheric turbulence. Watching one of the videos directly, turbulence in the atmosphere (called “seeing”) makes it look as though the moon was dropped into a vat of boiling water…the details on it’s surface jump and bounce around as though the surface of that water were bubbling and roiling. However, statistically, every so often that roiling turbulence settles and clears, and in those momentary milliseconds, the moon shines through the atmosphere with near-perfect clarity. Lucky clarity…for lucky imaging. 😉
It’s those moments of near perfect clarity that one has to seek out, extract from the videos, and integrate together to produce the kind of very clean, detailed images of the moon’s surface I’m sharing here today. I used the Canon 7D along with my EF 600mm f/4 L II lens and EF 2x TC III, 1200mm worth of focal length, and a 10x 720p HD video recording mode in BackyardEOS software, to get the necessary video sequences to produce these images. However, very expensive equipment like the 600mm lens is not a necessity. The use of a smaller telescope, a nice 80mm or larger refractor, an 8-10″ Newtonian, or an 8″ SCT or RC telescope…all of which can often be found for relatively reasonable prices (particularly the newtonians), can be used with T-adapters and your average DSLR like a Canon Rebel or Nikon D5300 to create similar images. There are also various free software programs out there that will help you record video sequences, and the program AutoStakkert!2 is also free (as is Registax 6, another tool like AutoStakkert…although I think the latter is easier to use.) The real key is using a mount that can track the moon across the sky…many smaller telescopes come with basic tracking mounts, and in general that should be all you need. In a pinch, if you could manually track the moon somewhat decently, even a manual german equatorial mount should do.

fantástica!
Espectacular, Realmente Muy Buenas… Un Saludo.
Really wonderful Shot.
Wow! This is absolutely breath-taking and I liked you earlier photo too- sometime’s it’s not about how technically good your photo is but more about the spirit it captures. I would love to do photography like this but just the technology (working with all the software and equipment) intimidates me. Great job!
Those are amazing shots. I love the first one, it is almost NASA like.
Really nice images, and showing a knowledge of the field of astrophotography light years (pun intended) above mine… But to be completely honest, the new images are so perfect that seems almost… clinical. I hope you don’t mind if I say that I still prefer the crescent moonset one, which is simply amazing. Thanks for sharing!